-40%
SILICON CARBIDE - 120/220 Grit - 8 LBS - Rock Tumblers, Lapidary, Sandblasting
$ 13.7
- Description
- Size Guide
Description
An abrasive supply company for sand blasting, lapidary, tumbling, reborn doll, refractoryand more. We offer abrasives and supplies in the quantities you need, big or small.
Our
Shipping is FAST
! Usually arriving within 1 to 4 business days of shipment.
Silicon Carbide
120/220 Grit
8 LBS
Also available
in the following quantities
:
1lb, 2lb, 8lb, 25lb, and 40lbs
We offer our silicon carbide in bulk quantities for rock shops and frequent users. This dramatically reduces your costs.
Our cheapest price per LB delivered is in the 40lb package.
Also available in the following grits:
(Largest to smallest)
8, 10, 36, 46/70, 60, 60/90, 80, 100, 120, 120/220, 150, 180, 220, 240, 400, 500, 600, 800, 1000, 1200
Look inside our eBay store and navigate to the grit, size, or type of abrasive you need!
Other products we sell
: White Aluminum Oxide, Silicon Carbide, Glass Bead, Steel Shot, Corn Cob, Walnut Shell, Boron Carbide, Nozzles, and more!
Look inside our eBay store!
Description and Use: Rock tumbling, Glass Etching, Art additives, sandblasting, and more.
Silicon Carbide is very hard. It is used in sandblasting applications where the user needs a long lasting, hard, sharp abrasive. It is commonly used by professional glass etchers. It is harder and will last longer in a cabinet than aluminum oxide. Glass etchers most commonly purchase 120, 150, 180, and 220 grit.
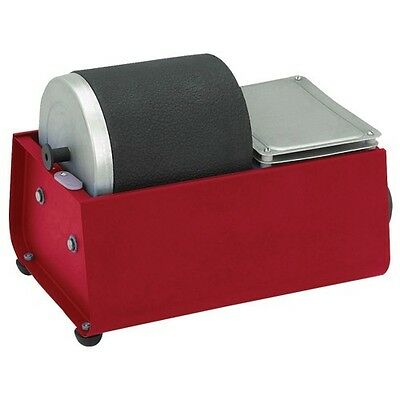
For those who are rock tumbling...
Rock Tumbling Guide:
This is a generic guide to serve as a starting point for many types of rocks. Feel free to experiment with your own methods based on your preferences and the kind of rocks you have. In the following paragraphs, you will find a step by step guide for polishing rocks. While each step will have suggested grit sizes, many users will vary the grit in that step, or add additional steps to the process.
Variations in grit selection also depend on the type of rocks being tumbled. Most users do not use aluminum oxide until the final polishing stage as it will not hold up like silicon carbide does.
Main Tricks of the Trade.
..Start with good quality non porous rocks. If you put trash rocks into the tumbler in the beginning, you will still have trash rocks at the end. It is imperative to thoroughly rinse your rocks and equipment between steps as even one grain of grit from the previous step will scratch your rocks as you go through the stages. Don't rinse your rocks in your sink as the grit slurry will clog your pipes. The grit guides in the steps below are a good starting point, when you figure out your own system, you may change grit sizes or add additional steps into the process.
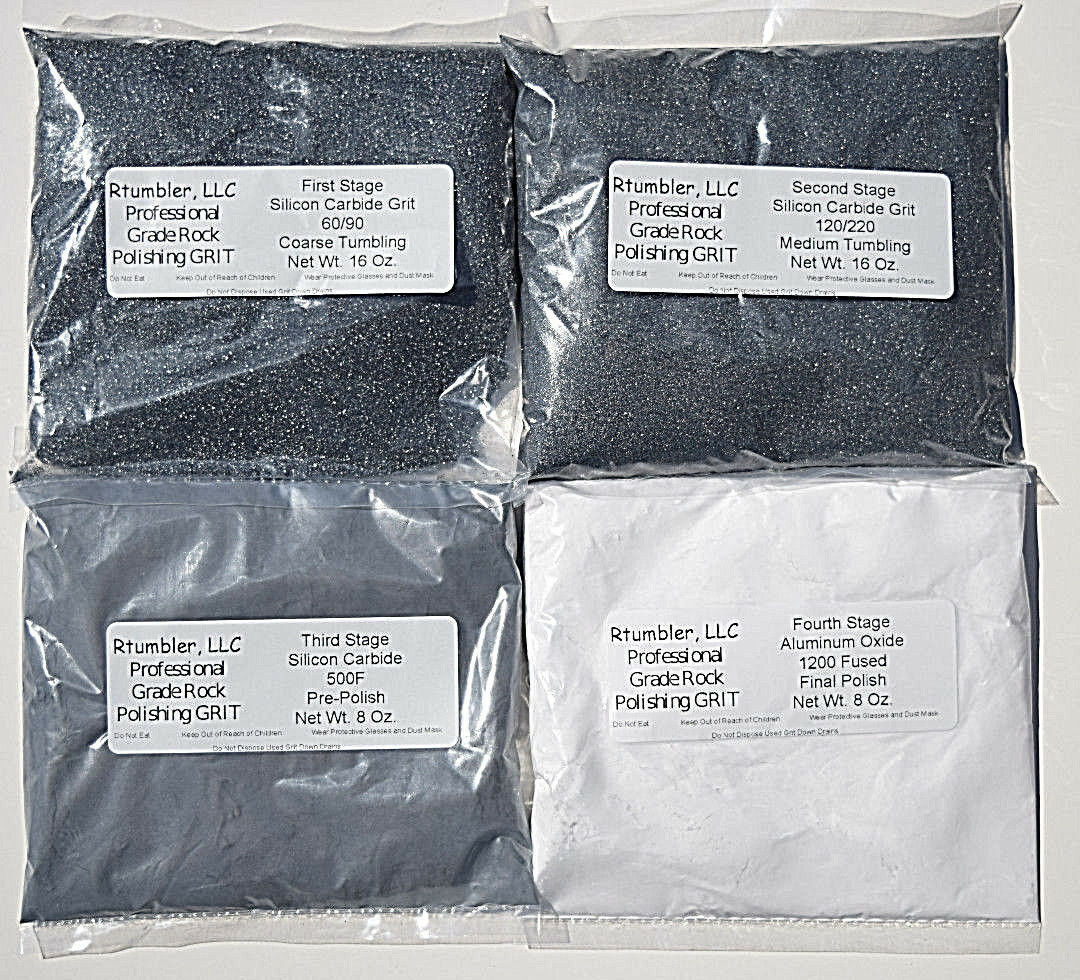
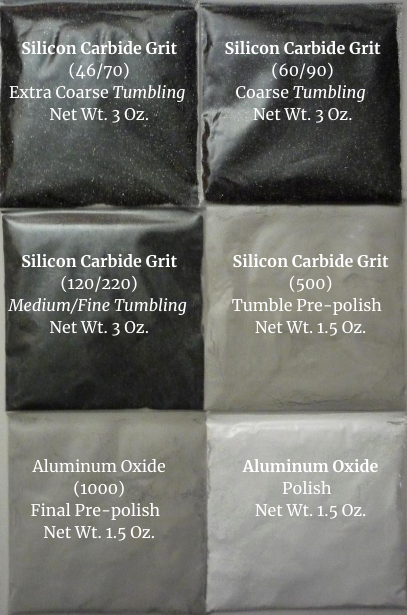
Step 1: Coarse Grind 60/90 Silicon Carbide
- Load rocks 1/2 to 1/3 the volume of the tumbling barrel, add water to just below the level of rock, add Two level tablespoons of grit for every LB or rock. Tumble for about 7 days (length can vary depending on your preference).
NOTE: Some people add a step before step one... with 36 Grit OR 46/70 Grit Silicon Carbide.
After step one, clean rocks and tumbler barrel THOROUGHLY of any old grit by rinsing in a strainer over a bucket, (NOT IN YOUR SINK). It is important before moving forward that no Grit from the previous step remains, or it will scratch your rock.
Step 2: Medium Grind
- Silicon Carbide 120/220 - Load rocks 1/2 to 1/3 the volume of the tumbling barrel, add water to just below the level of rock, add two level tablespoons of grit for every LB or rock. Tumble for about 7 days (length can vary depending on your preference).
After step two, clean rocks and tumbler barrel THOROUGHLY of any old grit by rinsing in a strainer over a bucket, (NOT IN YOUR SINK). It is important before moving forward that no Grit from the previous step remains or it will Marr your rock.
Step 3: Pre Polish
- Silicon Carbide 500 or 600 Grit. Load rocks 1/2 to 1/3 the volume of the tumbling barrel, add water to just below the level of rock, add Two level tablespoons of grit for every LB or rock. Tumble for about 7 days (length can vary depending on your preference).
After step three, clean rocks and tumbler barrel THOROUGHLY of any old grit by rinsing in a strainer over a bucket, (NOT IN YOUR SINK). It is important before moving forward that no Grit from the previous step remains or it will Marr your rock.
Step 4: Polish –
There are many types of polishes and the selection of which depends a lot on preference and desired shine, but also on the type of rock being tumbled. Many of our users use white aluminum oxide 1200 grit as the polishing step.
Load rocks to 1/2 to 1/3 the volume of the tumbling barrel, add water to just below the level of rock, add Two level tablespoons of grit for every LB or rock. Tumble for about 7 days (length can vary depending on your preference).
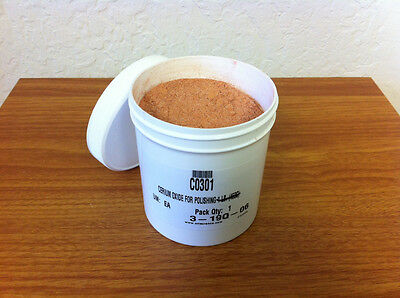
After step four, clean your rocks thoroughly in a strainer over a bucket. You should really be seeing a shine now....If the rocks are still hazy you can add the 5th step called "burnishing".
Step 5: Burnish -
Load rocks to 1/2 to 1/3 the volume of the tumbling barrel, add water to just below the level of rock, add One level tablespoons of Burnishing soap for every LB or rock. Tumble for a few hours. Rinse. Your Done!
General Sand Blasting info - for your reference...
Particle Size Conversion Chart
: Use the following charts to cross reference different grit grading systems with their associated sizes.
FEPA Grit
Microns
Millimeters
Inches
ASTM GRIT
Tyler Mesh
US Sieve
5600
3 1/2
3 1/2
3 1/2
4
4750
4.75
0.189
4
4
4
5
4000
4
0.159
5
5
5
6
3350
3.35
0.133
6
6
6
7
2800
2.8
0.111
7
7
7
8
2360
2.36
0.094
8
8
8
10
2000
2
0.079
10
9
10
12
1700
1.7
0.068
12
10
12
14
1400
1.4
0.056
14
12
14
16
1180
1.18
0.047
16
14
16
20
1000
1
0.04
18
16
18
22
850
0.85
0.034
20
20
20
24
710
0.71
0.028
25
24
25
30
600
0.6
0.024
30
28
30
36
500
0.5
0.02
35
32
35
40
425
0.425
0.017
40
35
40
46
355
0.355
0.014
45
42
45
54
300
0.3
0.012
50
48
50
60
250
0.25
0.01
60
60
60
70
212
0.212
0.008
70
65
70
80
180
0.18
0.007
80
80
80
90
150
0.15
0.006
100
100
100
100
125
0.125
0.005
120
115
120
120
106
0.106
0.004
140
150
140
150
75
0.075
0.003
200
200
200
180
63
0.063
0.0025
230
250
230
220
53
0.053
0.0021
270
270
270
45
0.045
0.0018
325
325
325
Micro Grits
FEPA
Grit
Microns
Millimeters
Inches
ANSI Grit
Tyler Mesh
50
0.05
0.002
240
230
53
0.053
0.00211
240
44.5
0.0445
0.00177
45
0.045
0.0018
F
39.5
0.0395
0.00156
280
280
36.5
0.0365
0.00145
29.5
0.0295
0.00116
320
320
29.2
0.0292
0.00116
27.5
0.0275
0.0011
FF
360
22.8
0.0228
0.00091
18.3
0.0183
0.00072
400
400
400
17.3
0.0173
0.00069
16
0.016
0.00063
FFF
13.9
0.0139
0.00055
500
500
12.8
0.0128
0.00051
11
0.011
0.00043
FFFF
10.6
0.0106
0.00042
600
600
9.3
0.0093
0.00037
7.8
0.0077
0.0003
800
800
6.5
0.0065
0.00026
5.8
0.0058
0.00023
1000
1000
4.5
0.0045
0.00018
3.8
0.0038
0.00015
1200
1200
3
0.003
0.00012
1500
2
0.002
0.00008
2000
1.2
0.0012
0.00005
The difference between round and angular abrasives:
The term "bead blasting" has come to be the generic term for media blasting or "sand blasting". This may be confusing to beginners when they are choosing their grit, as they may assume that they should buy "glass bead". In fact, different abrasives are used for different purposes. Glass bead is round, like a ball. It peens, refines, cleans, and shines metal surfaces as it is used. Additionally, it removes burrs and preps the work surface for paint or other coatings. While it will remove small amounts of rust, paint, or other material, that is not its intended purpose, nor is it an effective choice. If you need to smooth out a surface, prep for paint, shine aluminum or other metals, or remove burrs...then it is a great choice.
When the user needs to strip paint, rust, or otherwise remove material from an object. They should choose an angular abrasive like aluminum oxide, garnet, or similar. These abrasives are shaped with sharp edges and will slice away layers to get to the good surface. Glass bead, being round, will repeatedly pound the surface.
Many commercial operations run two cabinets, the first with a stripping abrasive like aluminum oxide, and the second with glass bead.
As a starting point, every cabinet deserves to have two things sitting next to it from the beginning...Aluminum Oxide and Glass Bead.
Most users will be able to accomplish most of their tasks with those two products. A good starting point is white aluminum oxide 100 grit, and glass bead mil 8 (some call it 80).
How to choose an abrasive:
The first question to ask is whether you are working inside of a cabinet where the product can be contained and reused, or, are you out in the open where you are unable to continually reuse it? If you are in a cabinet, then you should choose a higher quality abrasive like Aluminum Oxide, for your stripping needs. While it may be more costly up front, it quickly becomes cheaper as you continually use it. If however, you are sand blasting in a garage where you are unable to recover a bulk of the product, then use something more economical.
In cases where you are outside of a cabinet, but are able to recapture the abrasive on a floor, tarp, or by other means, sweep it up and reuse it. But, before you put it back into your system run it through an old window screen to remove large debris.
The two most common problems with blast systems:
To small of a compressor.
When a system is not functioning correctly
, their are typically two main culprits. The first is an undersized compressor. Typically people assume that if they are running the correct pressure, than it should work. However pressure is not the same as volume. Every individual system requires a certain volume of air, or CFM (Cubic Feet per Minute), to effectively pick up the abrasive and flow it out the other end. Once you have the volume, than you can worry about the pressure your abrasive works best at. In addition, you must match your nozzle opening size to the amount of CFM your compressor can put out (you can find charts online).
In general, purchase the largest compressor you can afford, you wont regret it :-)
If your stuck...To make the best of an undersized system, you may consider the following: decrease your nozzle size, take breaks while blasting to let the compressor catch up, choose light abrasives that are easy to pick up.
Moisture in the system:
The second most common blasting problem is moisture in the system. Every running compressor condenses the moisture that naturally occurs in the air and introduces it into your air tools, abrasive, or other operation. It is a constant battle to combat this, especially in humid environments. If you feel like the gun is "surging" in your hand, or clogging, you probably have moisture. Additionally, if your compressor is undersized, and continually runs while you are blasting without stopping, it is constantly heating up, which in turn condenses moisture at an even higher rate. Solutions to this problem include having a large enough system that it is not running all the time without a break, refrigerated air coolers or dryers (expensive), moisture removal filters (inexpensive), and various types of home made copper or metal snakes with drains, bolted to your wall (google it).
Most people are not going to purchase a refrigerated air dryer, but if you are handy, you can make a "snake" of copper with at least 50 linear feet (the more the better) of pipe and bolt it to your wall right next to your compressor. As the air runs out of the compressor, it will first travel through this snake and cool rapidly as it touches the metal. A higher percentage of the moisture will then collect at the bottom of these pipes, rather then travelling on to your mainline and tool. Additionally, there are many affordable moisture removal filters on the market.
About our listings:
Shipping:
We typically ship within one business day. The product than takes at least 1 to 3 business days to arrive, barring any problems in the air or on the ro
ad.
About us:
We are a small family company. A great deal of thoughtfulness and precision go into everything we do
.
We supply our abrasives in different quantities, so you can choose the right amount for your needs.
Problems:
Yup, I'm a human too. Every once in a while I mess up, just like you. So don’t be a mister angry pants turkey face. If I cause a problem, I will fix it. We want your business forever.
Items scanned "delivered"-
If a package has not arrived or is otherwise missing, we handle all problems up to the point it is scanned "delivered". If the post office has scanned your item "delivered" and you still do not have it, we will walk you through how to contact them. They will not communicate with the sender on items marked "delivered" other than to tell us that they were delivered. Again, we take care of all missing packages until it has been scanned "delivered", after that, you must contact the postal service.
Our listings, adds, pictures, and write-ups
: The stuff we write is ours, don't steal it, do your own work.
Pictures:
We always use pictures of the actual product in our add, but not necessarily the quantity.
SHIPPING PRICE is valid for
the United States of America,
PO/FPO destinations,
Guam, Puerto Rico, and the U.S. Virgin Islands.
International buyers welcome!


